JS1 Note on Basic Tech.
TECHNOLOGY
Definition:
Technology
can be defined as the scientific knowledge used in practical ways to meet and
satisfy human needs and comforts.
We can also
say Technology is the method or processes by which people produce or process
what they eat, drink, wear and use.
Meaning of Technology:
A very long
time ago, man carried out all his activities manually. For instance, transportation
was mainly on foot. All food processing were done manually and laboriously.
Later, man used beasts of burden like camels, horses, and donkeys as means of
transportation.
Technology
is needed by man to meet and satisfy his needs with maximum comforts.
Types of
Technology:
(i)
Highly
Developed Technology
involves the methods of carrying out any work through the use of machines e.g.
Tractors, combine harvesters, refrigerators, micro-waves.
(ii)
Under
Developed Technology
involves the use of manual processes e.g. use of cutlass for weeding, the use
of hook and net for fishing, trekking, using grinding stone to grind food
ingredients etc.
Arms/Segments
of Basic Technology:
Basic
Technology as a subject deals with the following aspects:
(i)
Technical Drawing
(ii)
Ceramics
(iii) Electricity
(iv) Building
construction
(v)
Metal works
(vi) Electronics
(vii) Woodwork
(viii) Plastics
Products of
Technology:
Some
products of technology are:
(i)
Calculator
(ii)
Ceiling
fan
(iii)
Computer
(iv)
Motor
vehicles
(v)
CD/DVD
players
(vi)
Drum
set
(vii)
Photocopy
machine
(viii)
Oven
Exercise for
week1 Basic Technology (JS1)
Instruction: Outline differences between
under-developed and highly developed technology
Economic
Activity
|
Under-Development
Technology
|
Highly-Developed
Technology
|
FARMING
|
||
COMMUNICATION
|
||
LIGHTING
|
||
FISHING
|
||
TRANSPORTATION
|
||
FOOD
|
||
HUNTING
|
TECHNOLOGY AND
SOCIETY
Technology is not necessarily ‘transferred’, it
is developed. People develop technology when they improve their
knowledge, skills and procedures for making, using and doing things.
Technology leads to economic development of the
community where it is used. Technology can be applied to all aspects of human
endeavours, be it religion, politics, banking, social, business, academics and
sports.
All the countries in the world have been blessed
by nature. Abundant natural resources at
their disposal, but only countries with a well-developed technology makes
maximum use of her gifts for the benefit of her people. Countries with under-developed technology
cannot make adequate use of their natural resources. Such countries will sell
her raw materials at low prices to developed countries. For instance, Nigeria
exports her crude oil to USA ‘cheaply’ rather than refine the raw material here
then export finished products to countries so as to make more income. Such
situation is akin to a farmer who has a large piece of land for farming but
still beg people to give him food to eat.
Poor or under-developed technology can lead to
shortage of food and clothing, poor shelter, poor health, inefficient means of
transportation and communication and ineffective internal and external
security.
A good educational system is the bedrock of
developed technology. It encourages people to make use of both their brains and
hands to acquire suitable knowledge and skills to design and produce methods
and processes that will enable them to make maximum use of their resources for
the benefit of the society.
Exercises:
1. What are
five ways in which technology has improved standards of living?
2. Why do we
need technology literacy?
3.
How
can you briefly describe each of the stages in technology?
Research:
1. What are workshop tools?
2. What is a workshop?
WORKSHOP SAFETY:
DEFINITION, SAFETY RULES, SAFETY DEVICES
What’s a workshop?
A
workshop is a place where engineering works are being carried out by the
professionals or experts.
Examples
of workshops are:
1.
Carpentry workshop
2.
Welding workshop
3.
Auto mechanic
workshop
4.
Electrical workshop
5.
Sculpting workshop
Accidents
An accident is an
unexpected negative event or experience that happens to somebody. Accidents can
occur in the workshop.
A Workshop
Accident is a harm or injury that is done to someone in a workshop. Accidents
are caused by people and equipment used in the workshop.
Some
causes of workshop accidents:
1.
Lack of provision
of safety devices
2.
Failure to follow
laid-down methods for handling facilities and devices
3.
Failure to use
safety devices provided
Safety
Rules are instructions that professionals and
workshop users obey before an activity to prevent danger or risk during the
activity.
Some safety rules
are:
1.
Do not operate any
machine or use any tool without a prior knowledge or having being instructed on
how it should be used.
2.
Always wear an
overall while in the workshop.
3.
Always wear hard
covered shoes with hard soles.
4.
When in doubt,
always ask.
Safety
devices
Safety devices are
those devices that are designed or made to prevent injury or accidents. Some
safety devices reduce the extent of injury to humans and damages to equipment.
We can also define
Safety Devices as devices that work to help secure the safety of anyone who is
using them.
Some safety devices
are:
1.
Fire fighting equipment:
i.
Bucket of sand
ii.
Bucket of water
iii.
Fire extinguisher
2.
Safety glasses and
goggles
3.
Gloves
4.
First-aid kit
5.
A phone (to dial
emergency numbers in case of extreme accidents)
Exercises:
1.
What is a workshop?
2.
What is an accident?
3.
What is a workshop accident?
4.
What are safety rules/precautions?
5.
What are safety devices? Mention
four safety devices?
Research:
1.
What is an accident?
2.
Describe workshop accidents.
3.
Mention three safety devices.
4.
Mention four types of wood.
5.
Mention three uses of wood.
IDENTIFICATION OF
WOOD
We get wood from trees. Tress can be
found in the forest, farms, gardens, and along the streets. The longer trees
are left the bigger and taller they grow. When there are well grown, they are
‘fell’ and taken to the Saw-Mill where they are cut into marketable sizes.
Wood is one of the commonest used
materials because it is light, strong and be worked upon easily. Wood is used
in making furniture and cabinets. Wood
is used in building construction too.
The
major parts of a tree
1.
Root:
this
holds the tree firmly to the ground. The roots search for various mineral salts
in the moist ground. From the roots, water and mineral salts are carried upward
to the leaves.
2.
Trunk
or stem: this part acts as a support for the branches,
which it raises as high as possible towards the light. It is from the stem or
trunk that we get our timber.
CLASS ACTIVITY:
describe the following parts of a tree:
1.
Branches:____________________________________________________________________________________________
2.
Leaves:_______________________________________________________________________________________________
3.
Bark:_________________________________________________________________________________________________
The
Structure of Wood
Wood is made up of a number of
tiny-like units called cells. These cells are called Fibres or Tracheid.
They vary in length, but the strength of the wood primarily depends on the
thickness of the cell walls.

Features
of wood
As shown in the diagram above, when
a tree is felled the cross-section will show the Pith, the Back or Curtex, the
Sapwood, the heartwood, the annual rings,
the cambium Layer, and the Medullary Rays
Class Activity:
Describe the following parts of the cross section of a tree:
1.
The cambium layer:
2.
Sapwood:
3.
Heart wood:
4.
Medullary Rays:
5.
The Annual Growth Ring:
6.
The
Pith:
7.
The Back or Curtex:
Wood
Processing:-
Wood can be fell from two different areas,
which are the free area and the forest reserved area. The wood
can be transported to the sawmill
through Lorries, river or rail.
Wood
Conversion is the cutting of splitting of
wood into marketable sizes.
WOOD
SEASONING:
Wood Seasoning is the removal of
water or moisture content in wood.
Method of wood seasoning:
1.
Artificial Seasoning:
through the use of ‘kiln’
2.
Natural seasoning: through
air drying.
Reasons for seasoning wood:
1.
It makes the wood more durable
2.
It makes the wood lighter in weight
3.
It reduces the moisture content
4.
It makes the wood more stable
5.
It minimizes or prevents attacks
from water, bacteria and fungi.
Calculation
of the Moisture Content of wood
The moisture content of the timber
can be calculated using the formular:
Moisture
Content (M.C) = (weight of wet wood – weight of dry wood) x 100
Weight of dry wood
Example: A piece of timber
weighed 120kg before drying and 100kg after drying. Find the moisture content
of the timber.
Solution:
Wet
Wood = 120kg
Dry
Wood =
100kg
M.C. =(weight of wet wood
– weight of dry wood) x 100
Weight of dry wood
M.C.= (120 – 100) x 100
100
1
M.C. = 20%
Class Exercise:
1. A piece of timber
weighed 88kg before drying and 70kg after drying. Find the moisture content of
the timber.
2.
Mention 10 uses of wood.
Wood
Preservative
This is a process of treating wood
with chemicals called preservatives to prevent insects’ attack and therefore
prolong the service life of the wood.
Methods off Applying
Preservatives;
1.
By using brush
2.
By using pressure treatment
3.
By spraying
4.
By dipping
Types of preservatives:
1.
Tar oils
2.
Water borne
3.
Solvent type
Exercise:
1. What is wood?
2. What is the main
source of wood?
3. What are the major
parts of a tree?
4. How can the cross
section of a tree be drawn and label it correctly?
5. What are the parts
of the cross section of a tree?
6. What is wood
processing?
7. What is wood
conversion?
8. What is wood
seasoning?
9. What are the two
major types of seasoning?
10. Why is wood
seasoning recommendable?
11. How can you
calculate the Moisture Content of a piece of timber that weighed 120kg before
drying and 100kg after drying?
Research:
1. What is metal?
2. What are the three
main types of metal?
3. What is Metal
Processing?
4. What is a furnace?
5. How can a furnace
be described?
IDENTIFICATION OF METAL
A metal is a solid material
that is typically hard, opaque, shiny, and acts as good electrical and thermal
conductivity.
Types of Metal
There are two classifications of
engineering metals. These are:
i.
Ferrous Metals
ii.
Non-Ferrous Metals
Ferrous
Metals are metals that contain iron,
therefore they are magnetic. Ferrous metals are very strong, but they corrode
easily. Examples of ferrous metals are: alloy steel, stainless steel, cast
iron, tool steel, pig iron and wrought iron.
Non-ferrous
Metals are metals that do not contain
iron, so they are not magnetic. Non-ferrous irons have lower strength but
higher ability to resist corrosion. Non-ferrous metals are attractive in
colour. Examples of non-ferrous metals are: copper, brass, aluminium, zinc,
bronze and lead.
Properties
of metal:
Class Activity:
Question:
Explain
the following properties of metal:
1. Density:
2. Fusibility:
3. Magnetic Property:
4. Ductility:
5. Conductivity of
Heat:
6. Brittleness:
7. Tenacity:
8. Sound Test:
9. Colour or Lustre:
10. Toughness:
Metal
Processing
Metals are obtained from iron ore,
which is dug from the ground. Metals are extracted from the iron ore through
a process of smelting in a special equipment called Furnace.
A furnace is a device where metals
can be heated to a certain temperature.
Examples of furnace:
1. Electric Furnace: used for
producing other grades of metal and steel.
2. Blast Furnace: used for producing
pig iron.
3. Reverberating
Furnace:
used for producing non-ferrous metals
4. Open-heart Furnace: used for
producing special steel, stainless steel
5. Bessemer Converter: used for
producing other grades of metal or steel.
Class Activity: (a) Describe the following metals:
1. Iron ore:
2. Pig iron:
3. Cast Iron:
4. Alloy
(b) mention the uses of the
following examples of metals:
S/No
|
Metal
|
Uses
|
1
|
Mild steel
|
|
2
|
Wrought iron
|
|
3
|
Cast iron
|
|
4
|
Aluminium
|
|
5
|
Bell metal
|
|
6
|
Lead
|
(c) complete the following
equations:
i.
Copper +
_______________ = Brass
ii.
Copper + ________________ = Pewter
iii.
Phosphorous + Tin
+ ________________= Bronze
Exercises:
1.
What
is a metal?
2.
State
two categories of metals,
3.
List three examples of each of the major
categories of metals
4.
What
is Metal Processing?
5.
Describe
a furnace.
6.
Mention
4 examples of furnace
Homework:
1.
Mention
the names of 5 metals.
2.
State
5 uses of metals.
3.
What is an alloy?
|
IDENTIFICATION OF CERAMICS
CERAMICS are objects or products
made of clay that has been heated to a very high temperature so that it becomes
hard. Apart from clay, mud and cement can also be used to make ceramics.
Clay exists naturally in many parts
of the world. When it is wet, it can easily be molded. A POTTER is a person who moulds with clay.
POTTERY is the art of using clay to make various objects.
Identification of materials
used in manufacturing ceramics:
1.
CLAY:
Clay must be prepared before it
is used in pottery. The process involved in making clay objects are as follows:
i.
Moulding
ii.
Firing
iii.
Decoration
Some
clay products are pots, flower vases, effigies and cooking utensils.
2.
CEMENT:
This is one of the ceramic
materials for making concrete. It is regarded as ceramic because when mixed
with water it can be made into different shapes and become very hard when dry. Some
cement products are blocks, effigies and slate.
3.
GLASS:
This is made from sand, lime,
soda and potash. It is not dug from the ground like clay and it can be shaped
while soft and hardens on cooling. Some glass products are mirrors, bulbs,
bottles, lenses and flask
Properties
of Ceramics:
1. They
can break easily;
2. They
can withstand high temperature;
3. Ceramics
are less dense than most metals;
4. They
can be easily decorated;
5. They
are good electric insulators;
6. They
can withstand heavy compressive loads;
7. They
are not affected acids, water or oxygen.
Differences
between ceramics and metals:
S/No
|
Ceramics
|
Metals
|
1
|
They
are insulators. Electricity cannot pass through them.
|
They
are good electricity conductors
|
2
|
They
can break easily when dropped
|
They
cannot break easily when dropped
|
3
|
When
they are wet they can easily be moulded into various shapes and objects
|
Either
when they are wet or dry they cannot be easily moulded into another shape
|
4
|
They
can be mixed water to get soft
|
Water
cannot soften them
|
5
|
They
cannot be used for making bolts, nuts and screws
|
They
can be used for making bolts, nuts and screws
|
Class
exercise:
1. What
are ceramics?
2. What
is pottery?
3. Who
is a potter?
4. What
are the three materials for making cement?
5. What
is clay?
6. What
is cement?
7. What
are glasses?
8. What
are 5 properties of ceramics?
9. What
are 4 differences between ceramics and metals?
Research:
1.
What
are plastics?
2. What are the
names of the two types of plastics?
3. How can you
describe the two types of plastics?
4. What are the
three methods of making plastics?
5. What are 4
properties of plastics?
6.
What
is rubber?
IDENTIFICATION OF
PLASTICS AND RUBBER
Ø
PLASTICS
Plastics are
obtained from petrol-chemical products and they are moulded to shape at a very
high temperature. Plastics are non-metallic objects.
Types of
plastics
1. Thermoplastic:
these
are plastics that turn to liquid when heated and they can be remoulded. E.g
cups, keg etc
2. Thermoset:
these are plastics that do not turn to liquid when heated and they cannot be
remoulded. E.g shirt buttons, plastic handle of a cooking pot or knife, cases
of radio, television or telephones.
Methods of
making plastics
1. Injection
moulding: this is the process of making nylon and hair
combs.
2. Compression
moulding: used for making thermoset objects, e.g Pressing
Iron control knob.
3. Extrusion:
used for making pipes, tubes and rods.
4. Calendaring:
used
for making buckets and cups.
Properties
of Plastics
1. Plastics
are light in weight;
2. plastics
can crack easily;
3. plastics
can not rust;
4. plastics
can not withstand high temperature;
5. plastics
have high resistance to chemicals;
6. plastics
are electric insulators – current can not pass through them.
Ø
RUBBER
Rubber is an
elastic material, which regains its original shape when stretched and released.
Rubber is a non-metallic object.
Types of
Rubber
There are two
types of rubber, viz:
1. Natural
Rubber: this is the type of rubber which is obtained
from a white substance called LATEX obtained from trees.
2. Synthetic
or Artificial Rubber:
this is the typoe of rubber which is obtained from petroleum products.
Methods of
making Rubber products
1. Vacuum
forming;
2. extrusion;
3. compression
moulding;
4. calendaring
Properties
of Rubber
1. it
is elastic;
2. it
is an insulator;
3. it
absorbs shock;
4. it
floats on water;
5. it
is light in weight.
Uses of
Rubber
1. it
is used for making tyres;
2. it
is used for making catapult;
3. it
is used for making rain boots;
4. it
is used for making rubber sandals.
EXERCISES
1.
What is plastic?
2.
Mention the names
of the two types of plastics.
3.
Briefly describe
each of the two types of plastic.
4.
Describe the three
methods of making plastics.
5.
Mention 4
properties of plastic.
6.
What is rubber?
7.
Describe 2 types of
rubber.
8.
List 4 methods of
making rubber products.
9.
State 4 properties
of rubber.
10. Mention
4 uses of rubber.
Research:
1.
List four
properties of rubber.
2.
Mention four uses
of rubber.
BOARD PRACTICE: Meaning,
drawing instruments, care of instruments
Board
Practice is an aspect of Technical Drawing
that involves the process or method of drawing on the board with using the
drawing instruments appropriately.
Technical
Drawing is the drawing of an object with a
combination of straight and curve lines to produce the imaginary image of the
object ready for manufacture or reproduction
Technical
Drawing Instruments:
1. Drawing
board
2. Tee-square
3. Set-square
(30º - 60 º, 45 º angles)
4. Pair
of compasses
5. A
pair of dividers
6. Protractors
7. HB
pencil
8. 2H
pencil
9. Eraser
10. Pencil
sharpener
11. Templates
12. Scale
rule
13. French
curve
Board
practice steps are:
Step
1: Place the drawing board
conveniently on the table with the square edge to the left-hand side.
Step
2: place the drawing paper on the
board leaving equal space all around.
Step
3: place the tee-square on the paper
with the stock on the tee-square firmly against the edge of the drawing board
on the left-hand side.
Step
4: slide the tee-square down gently
without moving the paper.
Step
5: cut four pieces of paper-tapes to
hold the paper in position and place them over the four corners if the paper.
The Title
Block is usually at the bottom right-hand
corner of the drawing paper and it is a piece of information, which enables
others to understand what the drawing is about.
Such
information entails the following:
1. Name
2. Subject
3. Topic
4. Class
5. Date
Exercises:
1. What
is board practice?
2. What
is Technical Drawing?
3. What
are ten Technical drawing instruments?
4. What
steps can be followed during board practice?
5. What
is title block?
6. What
is the information that can be found on a title block?
Research:
1. What
is freehand sketching?
2. Sketch
a school bus.
Woodwork handtools:
meaning, and marking out tools
As the name implies, Woodwork is a
profession that involves the use of timber wood to make objects, furniture and
buildings. Examples of woodworkers are
furniture makers and carpenters. A typical woodworker does most handy jobs in a
workshop.
Definition:A
workshop is a place where things are made or repaired.
The main item in a woodwork workshop
is the WORKBENCH. A workbench is a bench on which various woodwork
constructions are carried out. It is the major base for all woodwork
constructions.
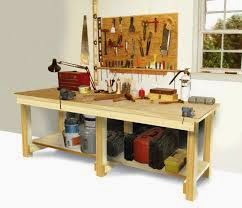
The centre of the bench is called a
‘WELL’. The function of the Well is to accommodate the tools brought from the
tool cupboard to the bench top during operations. The well prevents tools from
falling or rolling onto the floor.
The workbench has some appliances
that are attached to it in order to carry out the construction of the woodwork.
Types
and uses of workbench appliances:
 1.
Vice: this is fixed to the side of the bench. It is
used for holding wood when working on it.
1.
Vice: this is fixed to the side of the bench. It is
used for holding wood when working on it.
2.
Bench Stop: this
is used to prevent wood from slipping off the bench top during planning.


3.
G-Clamp:
this is a metal clamp which is in the form of letter ‘G’. it is used for
holding small jobs to the bench while sawing and chiseling.

4.
F-Clamp:
this is a metal clamp which is in form of letter ‘F’. it is used for holding
small jobs to the bench while sawing. It has quick action adjustment.
5.
Sash Clamp: this is a larger clamp. It is used for
holding and drawing woods tight together when assembling or gluing works

Woodwork Measuring tools
Examples of
measuring tools are:
1. Metric rule: this is the simplest measuring
tool in woodwork workshop. It comes as a metal, wood, plastic or coiled tape
rule.
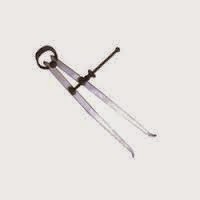
2. Inside caliper: this is used for measuring the diameter
of the inner part of a circular object.
3. Outside caliper: this is used to measure the
diameter of the outside part of a cylindrical bar.

4. Odd-leg caliper: this is used to measure the centre
of the round bars. In the odd-leg caliper one of its two legs is curved inward
while the other leg is straight. This caliper is also known as Jenny’s caliper

5. Pairs of dividers: this is used to measure the
diameter of the outside part of a cylindrical bar.

Woodwork MarkingOut tools:
After taking
measurements, the next step is to mark out the beginning and the end of the
measured length. Examples of marking out tools are as follows:
1.
Try-Square: this is used for marking lines that
form a right angle. It is also used to
test the squareness of an edge.

2.
Sliding Bevel: this is used for duplicating angles
and for setting out bevels. The sliding bevel is similar to a try-square but
its own blade is not fixed like the blade of try-square.

3.
Mitre Square: this is used to mark angles,
particularly, angle 45°.

4.
Compass: this is used to mark the arcs of a circle

Exercises
1. What is a workshop?
2. Describe a workbench.
3. What is the function of a well?
4. Name and sketch 4 workbench
appliances.
5. List and sketch 4 measuring tools.
6. List and sketch 4 marking out tools
Woodwork handtools:
drilling and boring tools
Boring is the process of making
holes into a timber or other objects.
Examples of some boring tools are:
1.
Wood brace
2.
Ratchet brace
3.
Bradawl

The RATCHET BRACE is an example of boring tool which is used for boring holes in
some hidden parts of a wooden material.
It has four parts, namely:
a.
The Head: this
is made of hardwood and shaped to fit the hand of the user. It is screwed to a
steel sleeve. It fits over the crank rod and runs on the hardened steel balls.
b.
The Crank:
this is a rectangular bent metal rod. It fits into the hardwood or plastic
handle
.
c.
The Chuck:
this is the end of the crank which is enlarged, threaded and slotted to receive
the socket and jaws respectively.
d.
The ratchet:
this is a tool fitted to the ratchet brace so that holes can be drilled (bored)
at specific parts that are not really exposed, such as corners where it is
impossible to make complete turn.
Exercises:
1.
Describe the
process of ‘boring’.
2.
List three boring
tools.
3.
Draw and label a
typical ratchet brace.
4.
Describe the four
parts of a ratchet brace.
Woodwork handtools:
holding and cutting tools
Holding
Devices
Holding Devices are used to hold
woods and metals firmly on a workbench or on a machine tool in order to have a
successful operation on them.
Some holding devices are bench vice,
bench hook, G-Clamp, Pliers, sash clamp and F-Clamp.
Vices
I.
Bench Vice:
this is used to hold wood and metal for filing, sawing, chiseling and tapping. They
are fitted into the edge of the workbench by bolts and nuts. The jaw is
tightened by rotating the bar.
II.
Hand Vice:
Unlike the bench vice, the hand vice is not fixed to anything. It is held by
the hand. The work piece is put in between the two arms of the vice and it is
tightened by means of a screw.
III.
Machine Vice:
the machine vice looks like a bench vice. However, it is not permanently fixed
on the machine tool bed. It can be rotated for machining at any desired angle.
Pliers
are work holding devices held in the hand of users. It is used for gripping and
cutting wires and thin metal sheets. Pliers come in different forms. Some
common pliers are:

I.
Long nose pliers
II.
Cutting pliers
III.
Combination pliers
IV.
Gripping pliers
Clamps
are used to hold work piece at right
angle while gluing and pining. Some clamps are:
I.
Sash clamp:
this is a large clamp used for holding and drawing parts of a work piece
together while gluing.
II.
G-clamp:
this is a metal clamp used for holding a work piece while sawing or chiseling.
It looks like letter ‘G’
III.
F-clamp:
this is a metal clamp used for holding a work piece while sawing or chiseling.
It looks like letter ‘F’

Some other holding devices are:
I.
Bench Holdfast:
this is used to hold job firmly on the bench when moulding and rebating
II.
Bench Hook:
this is used to hold job to the bench while sawing or chiseling. It is also
used to protect the bench.
Practical Class:
Use of holding devices to hold timber jobs.
Exercises:
1.
What are holding
devices used for?
2.
Mention 5 holding
devices.
3.
Mention three types
of vices.
4.
What are pliers?
5.
Mention four
examples of pliers.
6.
List three examples
of clamps.
7.
What is the
function of a bench holdfast?
8.
What is the
function of a bench hook?
Concept of Energy
and Power
Energy
is the ability of someone or something to do or produce work. Energy supplies
power with which work is done.
Animals,
including humans need energy to run, eat, play, jump, fly, push, pull and do
other activities. Non-living things like wind need energy to sway tree branches
and leaves. Fire needs energy to boil water. Without energy, birds can’t fly.
Work
is done when a force is used to move
somethingthrough a distance. The higher the amount of energy a body has the
more work it can do.
Energy
is measured in Joules, and the
instrument for measuring energy is the Energy Metre.
Power is
the rate at which work is done. Power is measured in Watts. The more the power the less the time taken to complete a
work.
The
symbol of energy is ‘E’ while the
unit of energy is ‘JOULE’
Importance of energy
1.
It makes life
possible. For instance, we know that there will be total darkness without light
energy. The earth will be extremely cold without heat energy and we would not
work with any tool without energy.
2.
Energy makes life
more comfortable. We use gas cooker, refrigerators, fans and blenders to make
our life more comfortable.
Forms of Energy
|
|
Forms
Of Energy
|
Sources
|
|
1
|
Potential energy
|
Objects on high platform
|
|
2
|
Nuclear energy
|
Atoms
|
|
3
|
Sound energy
|
Two objects hitting each other e.g.
two metals
|
|
4
|
Heat energy
|
Hot objects, burning fuel
substances,
|
|
5
|
Mechanical energy
|
Moving objects
|
|
6
|
Chemical energy
|
Fuel (charcoal, petrol etc) food
|
|
7
|
Light energy
|
Sun (solar), electric current
|
|
8
|
Electrical energy
|
Power Holding Company of Nigeria,
electricity, generators, batteries
|
The
two types of mechanical energy are potential
and kinetic energy.
Sources of Energy
1.
Renewable Energy
Source: this is an energy source which
supplies energy continuously. E.g. the sun, river and wind.
2.
Non-Renewable
Energy Source: this is an energy source which
may dry up with time. E.g. petroleum, coal and gas.
Group work:
Define
the following:
1.
Heat energy:
2.
Mechanical energy:
3.
Kinetic energy:
4.
Potential energy:
5.
Electrical energy:
6.
Chemical energy:
7.
Sound energy:
8.
Light/solar energy:
9.
Nuclear energy:
Exercises:
1.
What is energy?
2.
Define power?
3.
What is work?
4.
Mention 2 importance of energy.
5.
Describe the two sources of energy.
Concept of Energy
and Power 2
Energy
is the ability to do work. The higher
the amount of energy, the more work it can do. Energy is measured in joules.
Work
is done when a force is used to move an object through a distance.
Power
is the rate at which work is done, and it is measured in watts. The more power,
the less the time taken to complete a work.
Work
The force applied determines the
amount of work done and the distance moved in the direction of the force. So, Work (w) is then the product of force (f)
and distance (d).
Hence, we say W = F x D
The unit of force is Newton (N)
while distance is measured in meters (m). Work is then measured in Newton
meters (Nm) which is also called joule (j).
Example: Calculate
the work done when a force of 10N moves a body through a distance of 20m
Solution:
Work = force
x distance
= 10N x
20m
= 200Nm (or 200joules)
Power
Power is the rate at which work is
done. Power is determined by the work done and the time taken to do it. It can be expressed as shown below:
Power (P) = Work
done
Time
take to do the work
How energy, power and work are
related.
Energy
is required to do work. That is the reason why work and energy have the same
unit.
Example:
Bode pushes a load of mass 10kg to a distance of 30 meters in 20 seconds.
Calculate:
a.
The work done
b.
The energy used
c.
Bode’s power (g = 10 m/s2)
Solution:
a.
Work done = force x distance
Remember
that,
Force
= mass x g = 10 x 10 = 100N
So,
workdone = 100N x 30m = 2,000 joules
b.
Energy needed =
work done
Therefore
energy = 2,000 joules
c. Power
(P) = Work
done
Time
take to do the work
= 2000
20
= 200 watts
EXERCISES:
1.
What is energy?
2.
Define power?
3.
What is work?
4.
Mention 2
importance of energy.
5.
Describe the
sources of energy.
6.
Calculate the work
done when a force of 50N moves a body through a distance of 30m.
7.
Sunmisola pushes a
load of mass 10kg to a distance of 30 meters in 20 seconds. Calculate:
a.
The work done
b.
The energy used
c.
Sunmisola’s
power (g = 10 m/s2)


No comments:
Post a Comment